
PC Software · Guard Tour System V6.0
Quick Start Manual
English guide for EPORDO RFID patrol readers, checkpoint tags, and the Guard Tour Patrol Management Software.
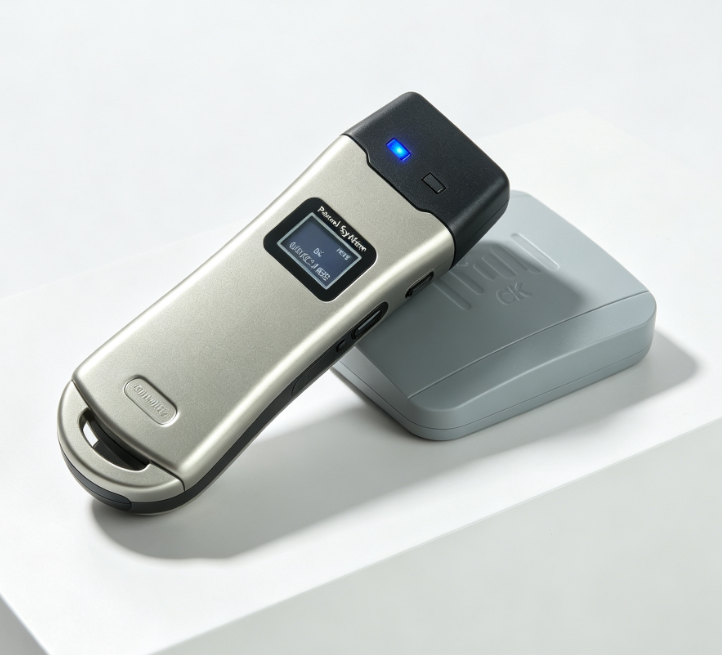
Hardware overview
A complete offline patrol kit includes the handheld reader, wall-mounted checkpoint tags, and a USB cable for downloading records to your PC.
Patrol reader (GPS-01LD)
Handheld RFID reader with LCD. Guards carry it on patrol and touch or approach each checkpoint to record the visit.
Checkpoint tag (CK)
Wall-mounted RFID tag that represents one location (entrance, stairwell, roof, etc.). Number tags in route order before mounting.
USB cable
Connects the reader to the PC so the software can import patrol records and register cards from the device.
Figure 1 — EPORDO patrol reader and checkpoint tag
Preparation before software setup
- Prepare an office PC with Windows 7 or above (macOS is not supported).
- Install the EPORDO Guard Tour Patrol Management Software (V6.0).
- Label checkpoint tags in order (1, 2, 3…) and keep them sorted for first-time scanning.
- Have the patrol reader fully charged and the USB cable ready.
Scan checkpoints with the reader
Before opening the software, use the patrol reader to scan every checkpoint tag once, in route order.
- Hold the top of the reader close to the checkpoint tag (CK).
- Wait for the blue indicator / LCD confirmation that the tag ID was recorded.
- Continue scanning tags 2, 3, 4… until all checkpoints are stored on the device.
Figure 2 — Bring the reader near the checkpoint tag to record the location ID
Run the software
- Launch Guard Tour Patrol Management System.
- Default account: admin
- Default password: 123
After login, follow the on-screen Operation steps wizard:
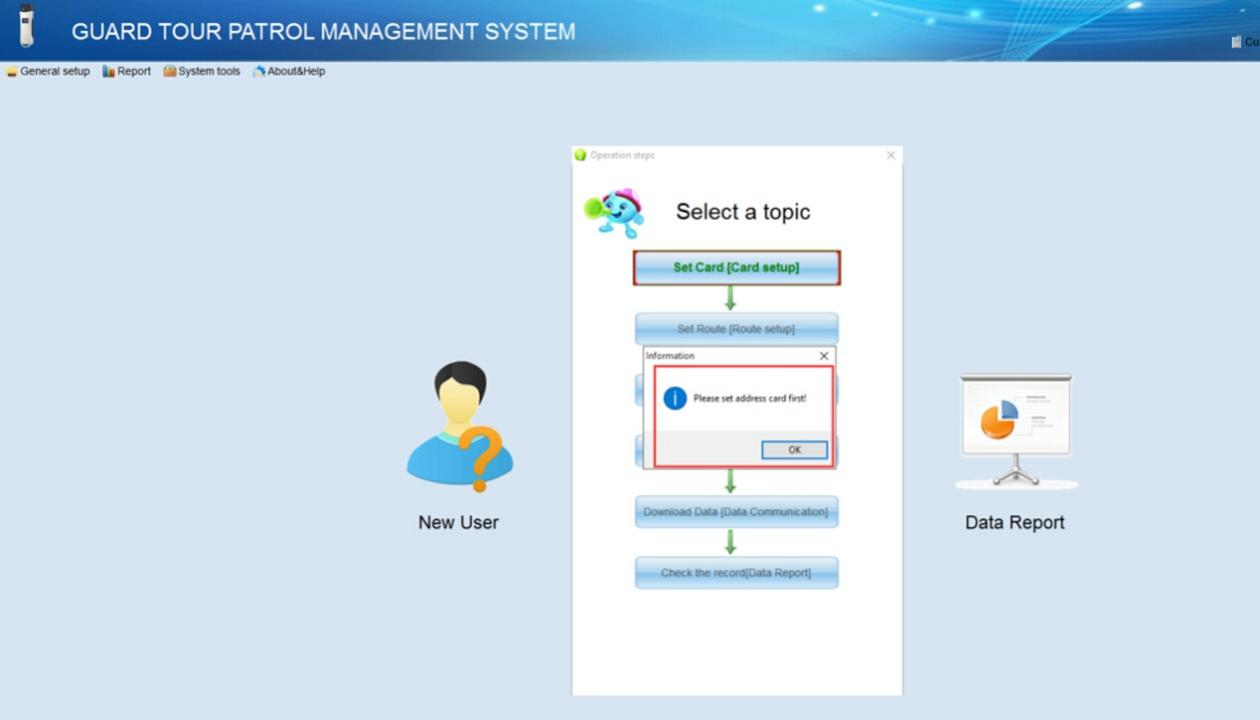
Figure 3 — Main screen and guided operation steps
Register checkpoint cards (Address cards)
Connect the patrol reader by USB, then register the checkpoint IDs you scanned in Step 03.
- Click Set Card. The software opens Card Register.
- Click Add from device. All checkpoint IDs scanned earlier appear in the same order.
- Tick the IDs you want to register.
- Set card type to Address card.
- Rename each checkpoint (Entrance, Stair A, Roof, etc.) and save.
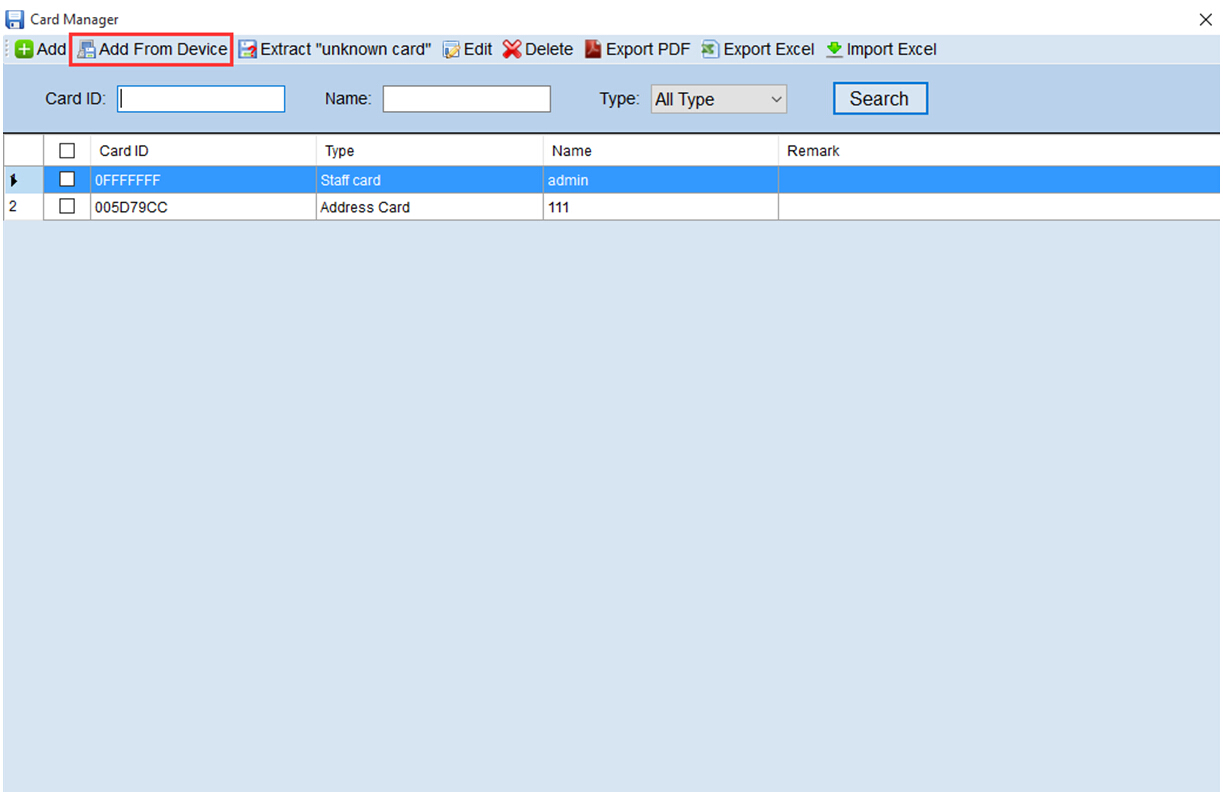
Figure 4 — Add checkpoint IDs from the device
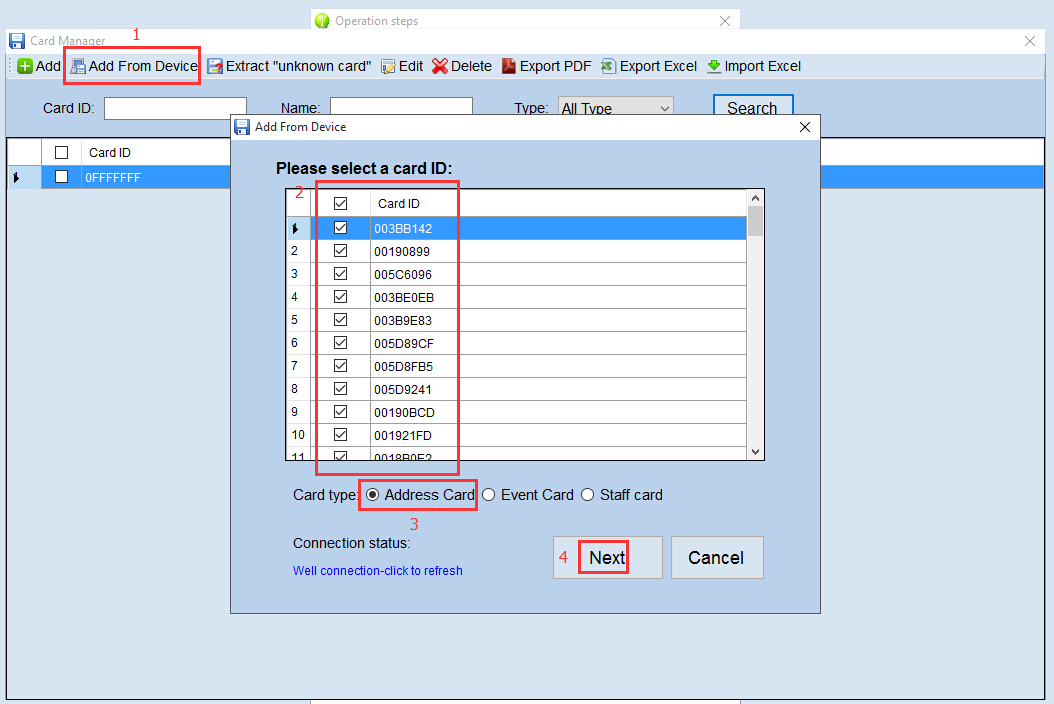
Figure 5 — Select type: Address card
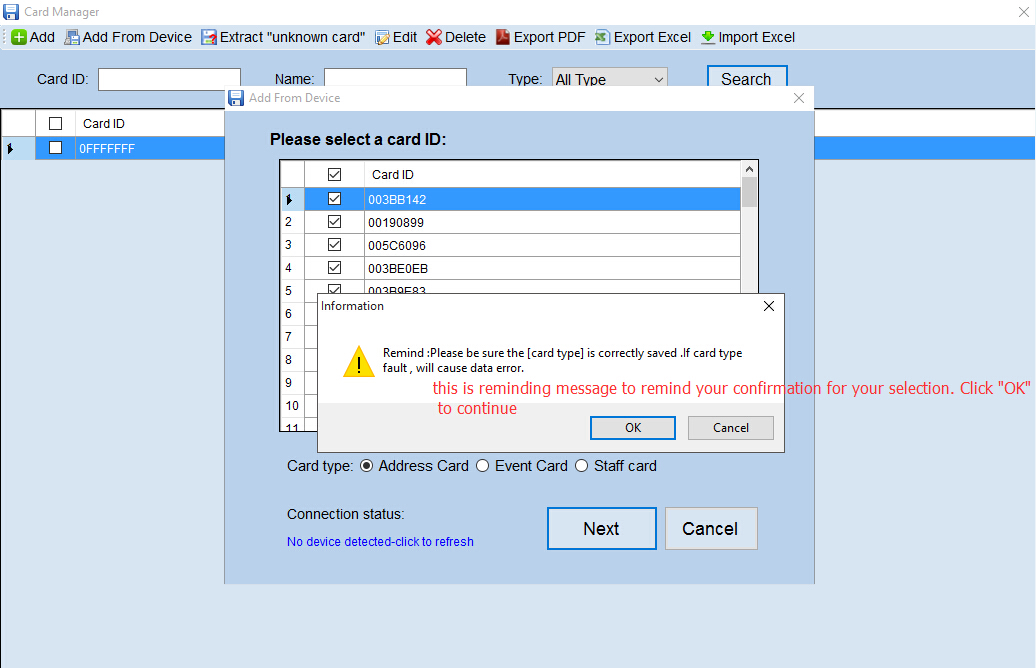
Figure 6 — Rename each checkpoint
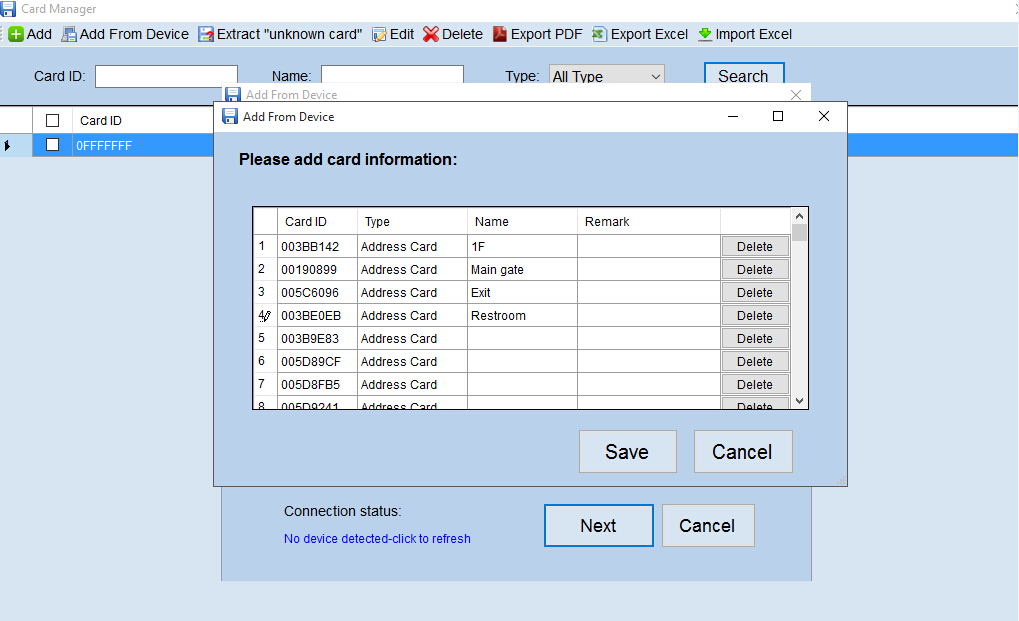
Figure 7 — Registered address cards
Register staff cards (optional)
Use staff / guard ID cards only when several guards share one reader, or when you need each patrol record linked to a named guard.
- Scan each staff card with the patrol reader (same method as checkpoints).
- In Card Register, click Add from device.
- Select the IDs and set card type to Staff card.
- Enter each guard’s name and save.
Set route
A route is a group of checkpoints for one site or area — for example “Logistics Park” with 10 checkpoints.
- Create a route name (e.g. Logistics Park).
- Select the route and click Add Address.
- Choose checkpoints from the list and add them to the route.
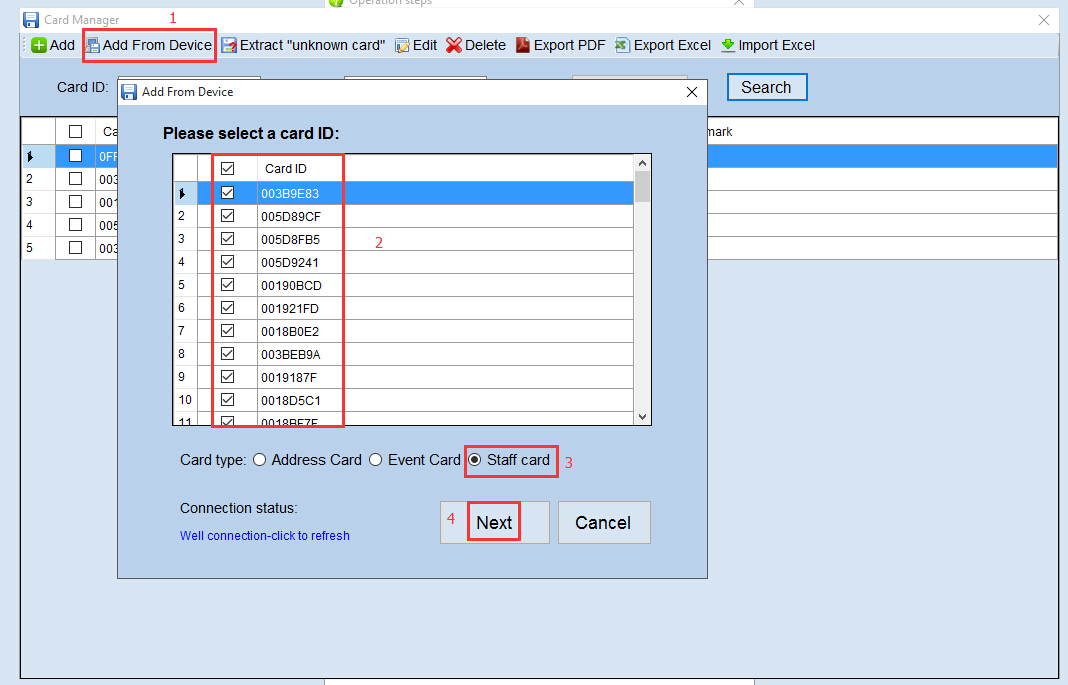
Figure 8 — Create and select a route
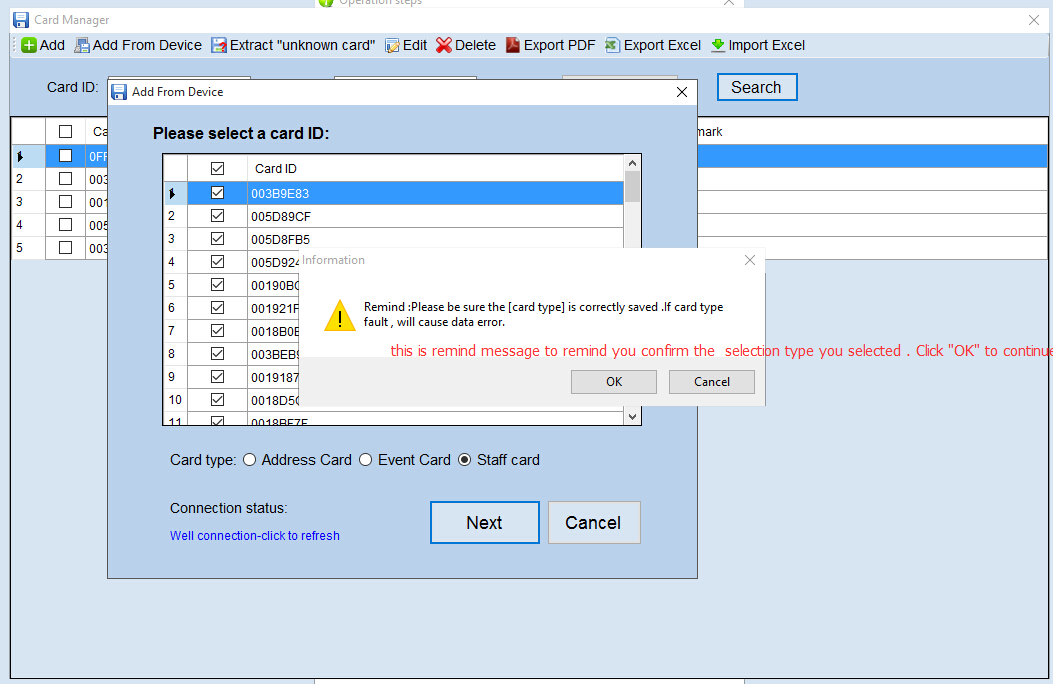
Figure 9 — Add checkpoints to the route
Set team (optional)
Team setup is optional. Use it when you manage multiple guard groups under the same software. Follow the on-screen team wizard or the full software user manual for advanced options.
Set schedule
A schedule is a daily patrol plan for a whole route (not for a single checkpoint).
- Open Set Schedule.
- Select the route and define start time, end time, and interval / rounds.
- Save the plan, then run a short test patrol and check the report.
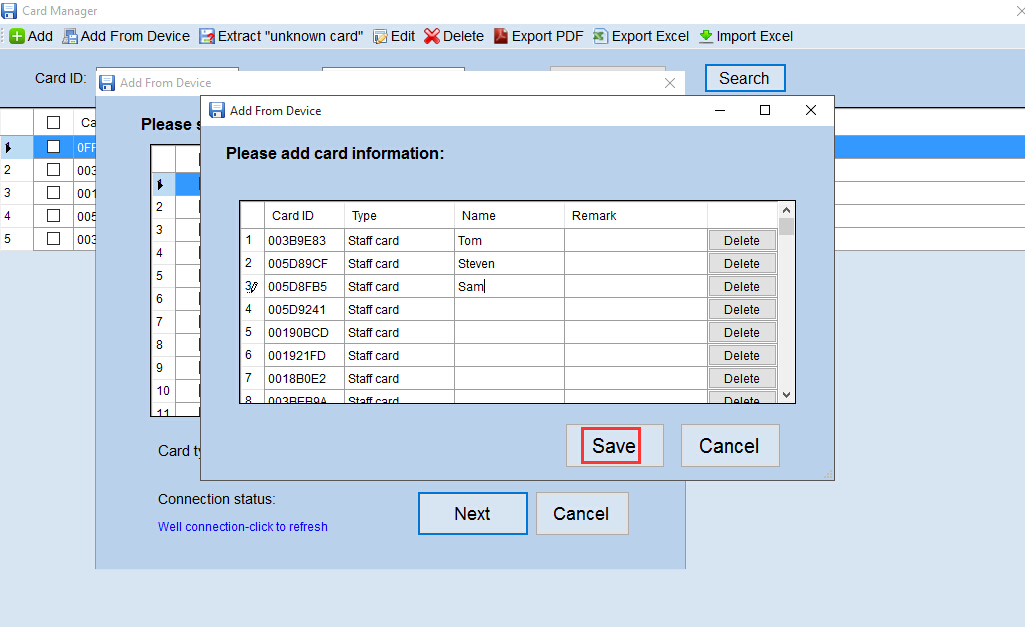
Figure 10 — Schedule setup for a full route
Basic setup is now complete. You can scan a few test points, download data, and verify the reports.
Download data & reports
Raw data
Shows every record downloaded from the device: route, address, card ID, time, staff, and device ID. Export to Excel or PDF as needed.
Data result
Compares actual patrols against your schedule — missed points, late rounds, and completed tours are easier to review here.
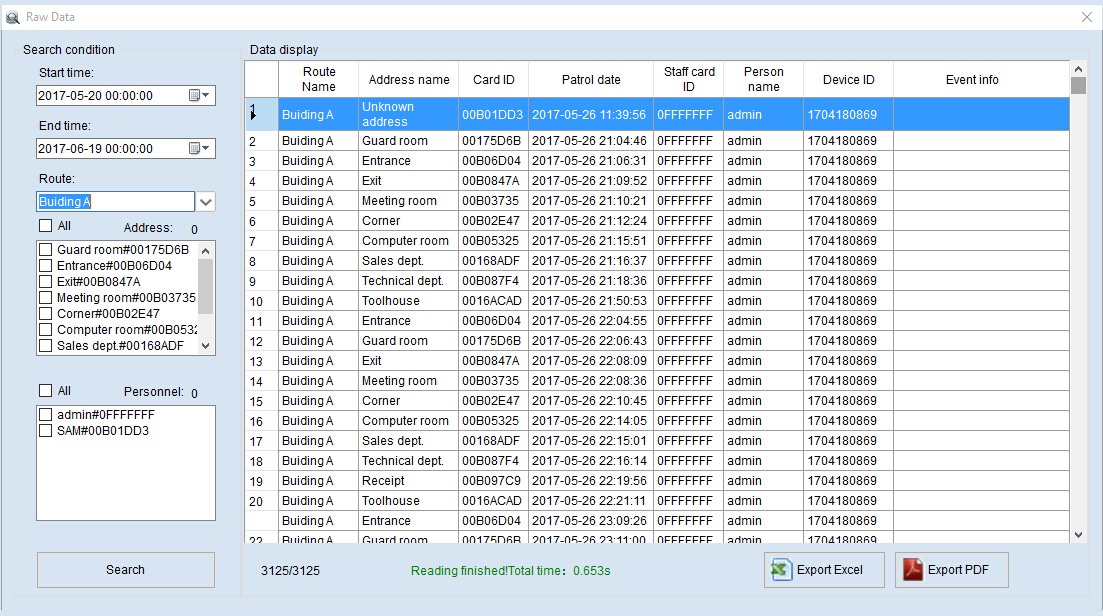
Figure 11 — Raw data view with search filters and export
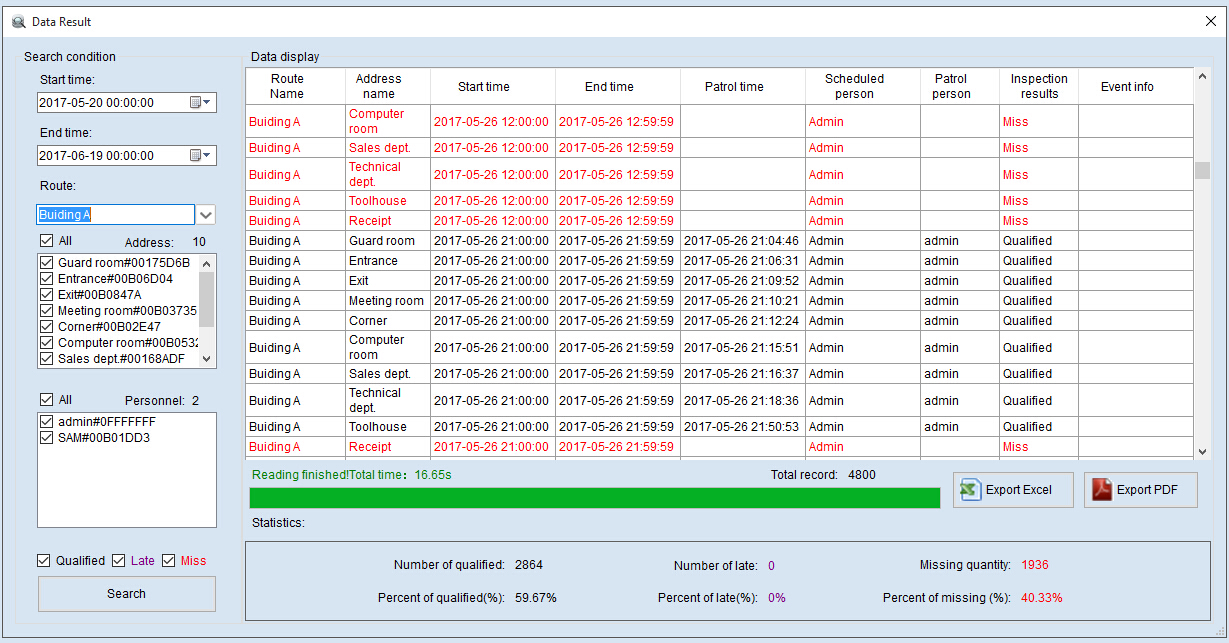
Figure 12 — Data result / attendance-style patrol summary
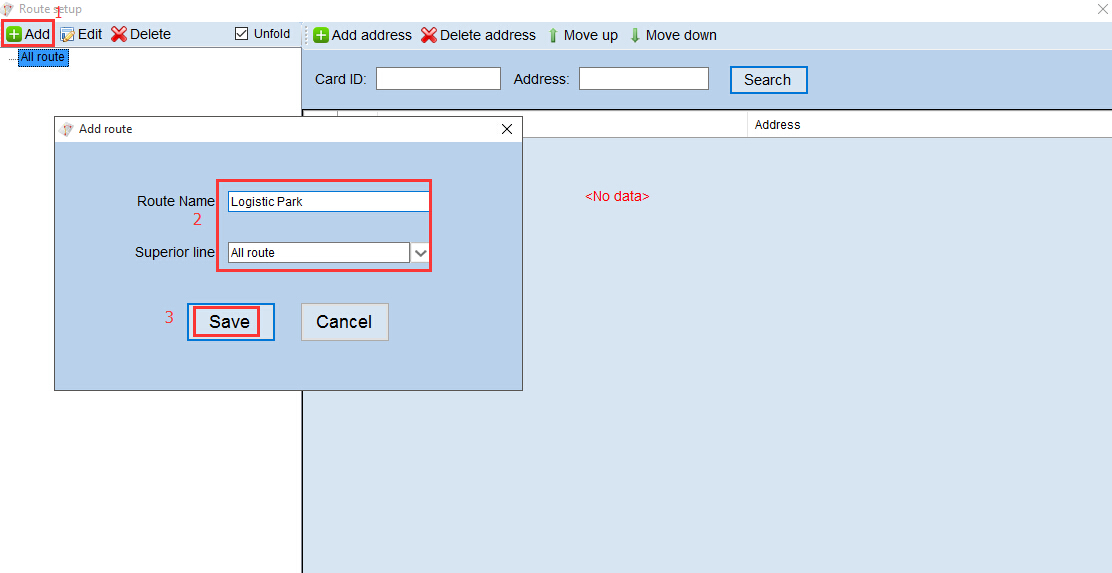
Figure 13 — Download patrol records from the reader to the PC
EPORDO contact
Shenzhen EPORDO Co., Ltd — Smart Office · Smart Home · Smart Hotel. Sales and technical support for overseas distributors and end customers.

Tel: +86 755 8825 7909 / 8341 8779
WhatsApp (Sales): +86 186 6533 2487 · WeChat: wy884422
WhatsApp (Tech): +86 158 1550 1089
Skype: efocus003@hotmail.com
Email: sophia@securiticn.com · epordo003@foxmail.com
Address: Block D, GuoShengJinXingLiangChuangShiDai, No.147 YingTai Street, Dalang, LongHua, Shenzhen, China